


Custom Mounting Brackets for Service Trucks: Installation Guide
Table of Contents
- Why Custom Mounting Brackets Matter for Service Trucks
- Service Truck Equipment Mounts: Mounting Locations and Configurations
- Material Choices: Steel vs. Aluminum for Custom Truck Brackets
- Equipment Mounting Bracket Installation: Step-by-Step Process
- Adjustable and Modular Mounting Systems for Fleet Flexibility
- Corrosion Resistance and Maintenance for Heavy-Duty Conditions
- Common Installation Mistakes to Avoid
- Frequently Asked Questions
Last Updated: October 5, 2026
Why Custom Mounting Brackets Matter for Service Trucks
Custom mounting brackets for service trucks aren't optional equipment, they're the foundation of an organized, productive fleet. When your technicians spend less time hunting for tools and more time on actual service calls, your operation runs faster and safer.

The challenge most fleet managers face is straightforward: off-the-shelf mounting solutions rarely fit the specific layout of your vehicles. A bracket designed for a generic pickup doesn't account for your department's unique compartment configuration, equipment load, or access requirements.
Custom mounting brackets solve this by matching your exact vehicle specifications, load requirements, and operational workflow.
The real value of custom mounting brackets shows up over time: consistent, reliable equipment placement across your fleet means faster response times, fewer damaged tools, and technicians who can focus on their actual job instead of wrestling with loose equipment.
Service Truck Equipment Mounts: Mounting Locations and Configurations
Choosing where to mount equipment depends on your vehicle type, available space, and how your team actually works. Different mounting locations serve different purposes, and the best choice often combines multiple approaches.
Truck Bed and Frame Mounting
Truck bed mounting is the most common approach for heavy equipment and bulk storage. Your bed provides open space and can handle significant load capacity when brackets are properly installed to the frame.
Frame-mounted brackets attach directly to the vehicle's structural components, distributing weight safely across the chassis. This is where you mount heavier items: toolboxes, equipment racks, or lighting fixtures that need to stay secure during rough terrain or emergency driving. Frame mounting requires precise measurement of bolt holes and structural points, but once installed correctly, it's the most stable option available.
Bed-mounted systems work well for items you need to access frequently during the day. A technician can reach tools without leaving the cab, improving workflow efficiency. The key is securing everything so equipment doesn't shift when the truck accelerates, brakes, or navigates rough ground.
Underbody and Toolbox Mounting
Underbody mounting keeps equipment protected from weather and theft while maximizing your bed space. This location works especially well for toolboxes, storage compartments, and equipment that doesn't need constant access.
Underbody toolbox mounting requires careful planning around suspension components, fuel lines, and electrical systems. You need clearance for ground obstacles and enough space for tool access when you need it. Many service trucks combine underbody storage with bed-mounted racks, using the undercarriage for bulk storage and the bed for daily-use equipment.
The advantage here is protection. Equipment mounted underneath stays out of the elements and out of sight, reducing security concerns on job sites. Underbody mounting also preserves bed space for larger cargo or additional equipment.
Cab and Roof Mounting Options
Cab and roof mounting puts equipment where your team can see it and access it quickly. Brow mounts (mounting on the cab roof edge) are popular for emergency lighting, scene lights, and communication equipment that needs visibility.

Roof-mounted equipment serves a specific purpose: visibility and quick deployment. For fire departments and emergency response vehicles, roof-mounted scene lighting is essential. For service trucks, roof mounting works for antennas, communication equipment, or auxiliary lighting.
The trade-off is aerodynamics and vehicle stability. Roof-mounted equipment adds weight high on the vehicle, which affects handling and fuel efficiency. It's best used for lighter equipment and only when the operational benefit justifies the impact.
Material Choices: Steel vs. Aluminum for Custom Truck Brackets
Your bracket material affects durability, weight, corrosion resistance, and long-term maintenance costs. The choice between steel and aluminum depends on your operating environment and budget.
Steel brackets are stronger and less expensive upfront. They handle higher loads and withstand impact better than aluminum. Steel is the standard choice for heavy-duty service trucks that carry significant equipment weight. The downside: steel rusts without proper coating. In harsh environments, salt spray, extreme humidity, coastal regions, steel requires regular maintenance and protective coating to prevent corrosion.
Aluminum brackets are lighter and naturally corrosion-resistant. They don't rust, which makes them ideal for vehicles operating in corrosive environments or where weight reduction matters. Aluminum is the choice for equipment that travels frequently or operates in wet, salty conditions.
Many fleets use steel for primary structural mounting (frame and bed) and aluminum for secondary mounting (toolboxes, compartment brackets) to balance strength, weight, and durability.
Equipment Mounting Bracket Installation: Step-by-Step Process
Proper installation is where custom mounting brackets prove their value. A poorly installed bracket fails under load, potentially damaging equipment or creating a safety hazard. The installation process requires planning, precision, and the right tools.
Pre-Installation Planning and Measurements
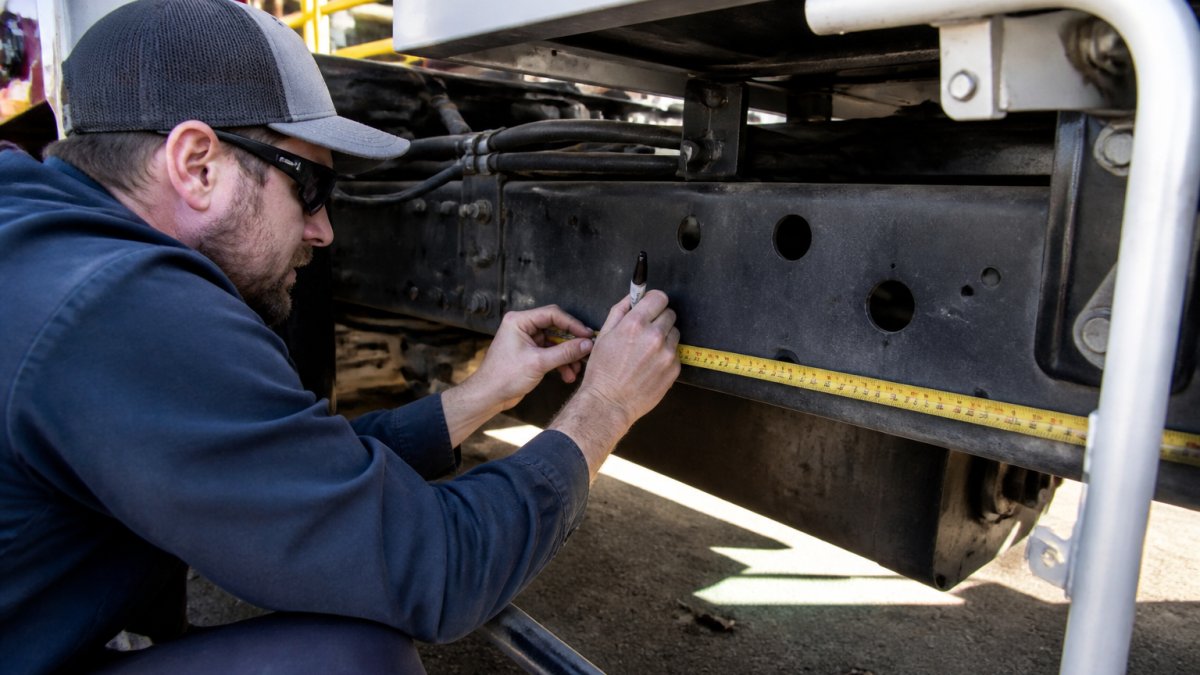
Before drilling, welding, or bolting anything, you need exact measurements and a clear plan. This is where most installation mistakes happen, rushing the measurement phase leads to misaligned brackets and wasted materials.
Start by identifying your mounting points. Mark the exact locations on your vehicle where brackets will attach. Use a measuring tape, level, and marking pen to ensure accuracy. If you're mounting multiple brackets, check alignment across the entire installation to avoid crooked or uneven equipment placement.
Verify that your mounting points align with structural components. Drilling into the wrong spot can compromise vehicle integrity or damage hidden electrical or fuel lines. When in doubt, consult your vehicle's service manual or contact a specialist.
Drilling, Welding, and Fastening Methods
Once measurements are confirmed, you're ready to attach brackets. Your method depends on the bracket type and your vehicle's construction.
Drilling is the most common approach for bolt-on brackets. Use a drill bit appropriate for your material (steel or aluminum), and always wear safety equipment. Start with a pilot hole to prevent the bit from slipping, then drill to full size.
Welding is necessary for permanent installations where bolt-on brackets aren't practical. Welding requires proper equipment and training, if your team doesn't have welding capability, this is where you bring in a specialist. Welded brackets are stronger than bolted ones, but they're also permanent and harder to modify later.
Fastening with bolts, nuts, and washers is the standard for most custom mounting brackets. Use stainless steel or zinc-plated fasteners to resist corrosion. Tighten bolts securely but not excessively, over-tightening can strip threads or crack brackets.
Load Capacity and Safety Verification
Before loading equipment, verify that your installation can handle the actual weight. This is a critical step that prevents equipment failure and potential accidents.
FRC Tripod Mounting brackets, FC603 →
Calculate your total load: add the weight of the bracket itself, the equipment it will hold, and any additional items that might be stored there. Compare this total to the bracket's rated capacity.
After installation, test the bracket under load before putting it into service. Apply weight gradually and look for any movement, flexing, or stress points. Check fasteners after the first week of use, vibration and movement can loosen bolts even when they're initially tight.
Perform regular inspections during routine vehicle maintenance. Look for rust, cracks, loose fasteners, or any signs of wear. A bracket that's secure today might develop problems after months of road vibration and weather exposure.
Adjustable and Modular Mounting Systems for Fleet Flexibility
Fixed brackets work well when you know exactly what you're mounting and where. But many service fleets need flexibility, the ability to reconfigure equipment as operational needs change.
Adjustable mounting systems let you reposition equipment without drilling new holes or welding new brackets. These systems use sliding rails, quick-release clamps, or repositionable fastening points.
Modular systems take this further. Individual mounting components connect to a central rail or frame, letting you build custom configurations for different truck types or operational requirements.
The advantage is operational flexibility and reduced long-term costs. When you can reuse mounting hardware across multiple vehicles or reconfigure as needs change, you're not locked into one setup. The trade-off is that adjustable systems typically cost more upfront than fixed brackets.
Traffic Safety System's extension pole mounting systems, like the EVOLUTION II Telescopic Pole Mounts (starting at $1,794.60), offer flexibility for scene lighting and emergency equipment.

Corrosion Resistance and Maintenance for Heavy-Duty Conditions
Your mounting brackets face constant exposure to weather, vibration, salt spray, and temperature extremes. Corrosion isn't just an appearance issue, it weakens the bracket and eventually leads to failure.
Steel brackets need protective coatings to resist corrosion. Powder coating, paint, or galvanizing all work, but they require maintenance. Check coatings regularly for chips or peeling, and touch up damaged areas before rust starts.
Aluminum brackets resist corrosion naturally, but they still need care. Saltwater and certain chemicals can pit aluminum surfaces. Regular rinsing with fresh water and occasional protective coating keeps aluminum brackets in good condition.
Fasteners are often the first thing to corrode. Use stainless steel or zinc-plated bolts, nuts, and washers. Replace any fasteners showing rust or corrosion during routine maintenance.
Inspect mounting brackets seasonally, especially after winter or extended exposure to harsh conditions. Look for surface rust, white corrosion on aluminum, loose fasteners, or cracks.
Common Installation Mistakes to Avoid
Most bracket failures trace back to installation errors rather than design flaws.
Skipping the measurement phase is the most common mistake.
Mounting to the wrong structural points creates safety hazards.
Underestimating load capacity causes brackets to flex, crack, or fail. Calculate your actual load accurately, including the bracket weight itself.
Neglecting fastener quality leads to corrosion and loosening. Using cheap bolts or fasteners inappropriate for your environment guarantees problems.
Ignoring vibration and maintenance allows minor problems to become major failures. Bolts loosen over time, coatings chip, and corrosion spreads.
Installing without considering access makes maintenance and repairs harder later.
Custom mounting brackets for service trucks transform how your fleet operates.
The key is starting with the right approach: accurate measurements, proper material selection, and installation methods that match your environment.
Traffic Safety System specializes in custom-fabricated mounting solutions tailored to the unique needs of public safety and industrial fleets.
Frequently Asked Questions
How do you choose mounting brackets for a service truck?
Start by identifying what equipment you're mounting (lights, toolboxes, racks) and where on the vehicle. Measure your truck's frame dimensions and load requirements. Consider whether you need permanent mounting or repositionable brackets. Steel brackets suit heavy-duty loads and harsh conditions, while aluminum works for lighter equipment and corrosion-prone environments. Vehicle compatibility matters most, confirm the bracket design fits your specific truck model, cab style, and frame structure before ordering.
What materials are best for custom truck brackets?
Steel brackets offer superior strength and durability for heavy loads and rough terrain. Aluminum brackets resist corrosion in salt spray and wet conditions, weigh less, and work well for scene lighting and moderate-duty equipment. Powder coating on either material provides corrosion protection. For service trucks operating in harsh environments (salt exposure, extreme cold, constant vibration), aluminum with quality powder coating or stainless steel fasteners prevents rust and extends service life. Steel remains the standard for maximum load capacity and structural support.
Can mounting brackets be custom-made for a specific truck or piece of equipment?
Yes. Custom fabrication allows brackets designed precisely for your truck's frame geometry, equipment specifications, and mounting location. Traffic Safety System offers custom design and fabrication services that account for your vehicle's unique dimensions and load requirements. Custom brackets eliminate fitment issues, reduce installation time, and ensure safe load distribution. Provide your truck model, year, equipment type, and any space constraints. Custom solutions cost more upfront but prevent costly rework and safety problems later.
What should you measure before ordering custom truck brackets?
Measure the distance from the truck frame to your desired mounting surface (standoff distance). Record frame width, depth, and material thickness at the attachment point. Determine equipment weight and dimensions, including any protruding parts. Note clearance needs relative to other compartments, doors, or accessories. Identify the fastener locations on your equipment and the truck's available bolt holes or welding points. Provide your truck's make, model, and year. These measurements ensure brackets fit properly and support the load safely without interfering with daily operations.