


Fleet Vehicle Lighting Maintenance Tips
Table of Contents
- Why Fleet Vehicle Lighting Maintenance Matters
- Building a Fleet Vehicle Lighting Inspection Checklist
- Emergency Vehicle LED Light Maintenance Procedures
- Vehicle Light Troubleshooting and Diagnostics
- Fleet Preventive Maintenance Schedule for Lighting Systems
- Mounting, Alignment, and Secure Installation
- Repair Versus Replace: Managing Fleet Lighting Costs
- Frequently Asked Questions
Last Updated: October 11, 2026
Why Fleet Vehicle Lighting Maintenance Matters
Proper fleet vehicle lighting maintenance is essential for public safety. Failed headlights, taillights, brake lights, and warning lights cause accidents, citations, and downtime. Emergency vehicles depend on visibility and signal clarity to protect responders and the public.
Fleet managers at fire departments, law enforcement agencies, and utility companies operate in demanding environments where equipment failures create safety gaps. A single failed taillight can lead to a collision; a broken turn signal compromises scene safety during roadside stops.
Preventive maintenance catches problems before they become emergencies. A burned-out bulb costs under $100 to replace; a collision involving failed lighting costs tens of thousands.
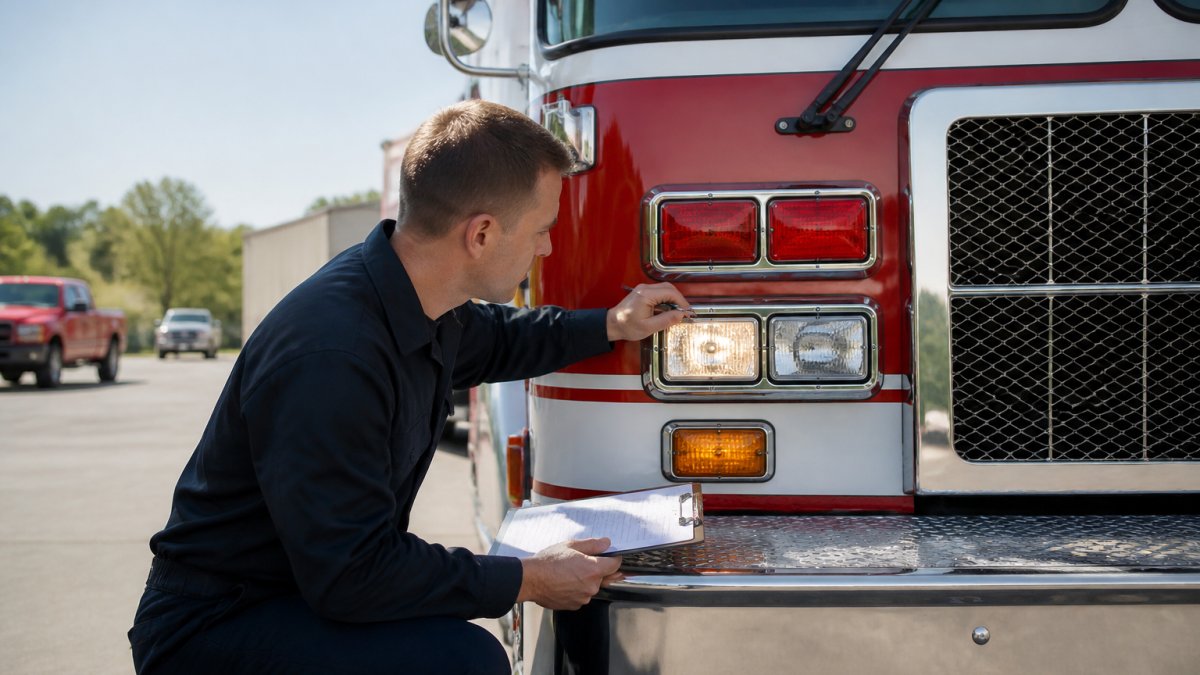
Building a Fleet Vehicle Lighting Inspection Checklist
A structured checklist transforms lighting maintenance from reactive repairs into predictable prevention, catching failures early and documenting conditions.
Pre-Trip Lighting Checks
Pre-trip inspections happen before every shift. Drivers or junior mechanics spend 5-10 minutes testing lights to catch obvious failures: burned-out bulbs, broken lenses, and loose connections.
Create a simple checklist:
- Headlights on high and low beam
- Fog lights (if equipped)
- Taillights and brake lights
- Turn signals front and rear
- Backup lights
- Warning lights and emergency flashers
- Marker lights and side reflectors
Drivers initial the checklist and log problems immediately, creating a compliance record and revealing patterns like recurring failures in specific circuits.
Scheduled Maintenance Inspections
Monthly or quarterly inspections examine wiring, connectors, mounting hardware, and lens condition in depth.
Check these items:
- Bulb brightness and color consistency
- Lens clarity and cracks
- Wiring for corrosion or damage
- Connectors for loose or corroded contacts
- Mounting hardware for rust or loose fasteners
- Gaskets and seals for deterioration
- Alignment of directional lights
Document findings with photos to support warranty claims and justify replacement budgets.
Emergency Vehicle LED Light Maintenance Procedures
LED lights last longer than halogen bulbs but dim gradually rather than burning out suddenly, making scheduled inspections critical.
Cleaning and Lens Care
Dirt, road salt, and debris reduce light output by 20-30% or more. Clean lenses monthly in harsh environments, quarterly in moderate conditions.
Use soft cloths and mild soap; avoid abrasive cleaners. Soak stubborn salt buildup with warm water first.
Replacement tempered glass lenses are available when cracks or cloudiness cannot be cleaned away. Traffic Safety System offers replacement tempered glass for Focus and Evolution light heads ($151.33) and replacement tempered glass for Optimum light heads ($181.85) to restore full optical clarity.


Bulb and LED Replacement
LED bulbs last 25,000-50,000 hours versus 1,000 for halogen. Use OEM or certified parts only to avoid inconsistent brightness and compliance issues.
Traffic Safety System stocks halogen replacement bulbs for Focus, Optimum, and NightMaster lampheads ($82.32), available in quartz halogen, halogen infrared (HIR), and high intensity discharge (HID) options. Each type offers different brightness and efficiency characteristics.

Never touch bulb glass with bare hands; skin oils shorten life and cause premature failure. Handle by the base only.
Vehicle Light Troubleshooting and Diagnostics
Systematic troubleshooting saves time and prevents unnecessary part replacement. Modern fleet vehicles integrate lighting into body control modules and multiplexed networks, making diagnosis more complex than simple bulb replacement.
Common Failure Modes and Initial Checks
Burned-out bulbs are the most common failure. If a bulb fails again within 50-100 hours, investigate power delivery, ground quality, or control-module output rather than replacing the bulb again.
Loose or corroded connectors cause intermittent failures. Disconnect, clean with a wire brush, apply dielectric grease, and reconnect firmly. Corrosion indicates moisture intrusion; replace gaskets and seals to prevent recurrence.
Mounting hardware failures cause lights to rattle and misalign. Check all bolts quarterly and tighten as needed. Use medium-strength thread-locking compound on critical fasteners.
Wiring damage from salt spray, debris, or impact breaks circuits. Replace damaged wiring entirely, not with patches; temporary repairs fail under vibration and create fire risk.
Electrical and Wiring Diagnostics for Intermittent Faults
Voltage and Ground Testing
Test voltage at the connector with the light circuit activated.
Test ground resistance between the connector and vehicle frame; should be under 0.5 ohms. Higher resistance indicates poor ground. Clean by scraping corrosion and applying dielectric grease.
Intermittent Fault Diagnosis
Wiggle harnesses and connectors while monitoring voltage. Movement causing voltage drop indicates a broken conductor or corroded contact; replace the harness or connector.
If voltage is present but the light does not illuminate, inspect the bulb for blackening or broken filament. LED modules that dim gradually require replacement.
Control-Module and Multiplexed Circuit Diagnostics
Modern vehicles route lighting through body control modules (BCMs) or lighting control modules (LCMs).
If a scan tool is unavailable, consult the service manual. Many modules have built-in self-diagnostics that flash dashboard warning lights when a circuit fails.
In multiplexed circuits, a single wire carries signals for multiple lights.
Documentation and Pattern Recognition
Document electrical test results on your inspection form. Patterns emerge over time: repeated failures in the same circuit point to design weakness or chronic corrosion; failures after rain indicate moisture intrusion; failures during rough terrain suggest loose connectors or damaged wiring.
Use these patterns to prioritize repairs. A vehicle with recurring turn-signal failures in the same connector should have that connector and harness replaced, not just the bulb replaced repeatedly.
Fleet Preventive Maintenance Schedule for Lighting Systems
A documented preventive maintenance schedule ensures consistency, forecasts parts budgets, and creates a compliance record demonstrating due diligence.
Maintenance Intervals by Environment and Vehicle Use
Coastal and salt-spray environments require monthly inspections. Salt accelerates corrosion of connectors, wiring, and housings. Pay special attention to ground connections and seals; salt intrusion causes intermittent failures.
Bulbs, Focus, Optimum, Halogen Replacement →
Moderate climates allow quarterly inspections; arid environments may extend to semi-annual, though pre-trip checks remain daily.
Freeze-thaw cycles cause connector failures from expansion and contraction. Monthly inspections catch loosening before failures. After winter, inspect all connectors and tighten hardware before spring operations.
Off-road and rough-terrain vehicles experience higher vibration and impact stress. Increase inspections to monthly or bi-weekly, focusing on mounting hardware, connector security, and wiring. Rough terrain accelerates dirt accumulation on lenses, reducing output by 20-30%.
Risk-Based Scheduling by Vehicle Class and Operational Role
Emergency Response Vehicles (Fire, Law Enforcement, EMS)
Emergency vehicles operate at night and high speeds; lighting failure increases collision risk. Inspect weekly or before every shift. Verify FMVSS 108 compliance quarterly: headlights 500-700 candlepower, red taillights visible from 500 feet, amber turn signals flashing 60-120 cycles per minute, warning flashers synchronized.
Aftermarket warning lights (light bars, scene lights) must comply with state regulations for color, placement, and flash patterns. Verify requirements to avoid citations.
Utility and Service Vehicles (Electrical, Water, Gas, Telecom)
Utility vehicles operate in varied conditions. Inspect quarterly and verify FMVSS 108 compliance for standard lighting and state regulations for work-zone warning lights.
Cargo and Delivery Vehicles
Cargo vehicles operate primarily during daylight. Inspect semi-annually and verify FMVSS 108 compliance. Pay attention to brake-light function; failure is a leading cause of rear-end collisions.
Support and Administrative Vehicles
Support vehicles operate primarily during daylight. Inspect annually and verify FMVSS 108 compliance.
Compliance Verification and Documentation
Federal Motor Vehicle Safety Standard (FMVSS) 108 sets minimum lighting requirements. Vehicles that fail to comply can be cited and deemed unroadworthy.
Headlights: Both function on low and high beam, brightness is adequate, alignment does not blind oncoming traffic, color is white or amber.
Taillights and Brake Lights: Both illuminate when headlights/brake pedal activated, color is red, visible from 500 feet in daylight.
Turn Signals: Front amber, rear amber or red (per state rules), both sides flash 60-120 cycles per minute, synchronized.
Backup Lights: White lights illuminate in reverse, both sides function.
Marker Lights and Reflectors: All function and are amber or red as required, reflectors are clean and undamaged.
Document compliance verification and photograph function if possible. Take non-compliant vehicles out of service immediately.
Maintenance Log and Predictive Scheduling
Create a maintenance log for each vehicle recording inspection dates, findings, parts replaced, compliance status, and technician name. This identifies chronic problems.
Use the log to forecast parts and predict failures. If one vehicle consistently fails turn signals, investigate the root cause rather than repeatedly replacing bulbs. If corrosion appears in multiple vehicles after winter, plan spring inspections.
Track repair costs per vehicle. If one vehicle requires repairs more than twice per year, replacing the lamp assembly may be more economical than ongoing repairs.
Mounting, Alignment, and Secure Installation
Loose mounting hardware causes lights to rattle, misalign, and eventually fail from vibration damage. Proper installation and regular checks prevent these failures.
Check mounting bolts on every scheduled inspection. Vibration from driving loosens fasteners incrementally. A bolt that's hand-tight today may be loose in two weeks. Use thread-locking compound on critical fasteners to prevent vibration loosening.
Verify light alignment quarterly. Headlights should illuminate the road ahead without blinding oncoming traffic. Misaligned lights reduce visibility and violate regulations. Most vehicles have adjustment screws or slots on the lamphead mounting.
Inspect swivel mounts for cracks or wear. These allow lights to rotate for scene illumination. Broken swivel mounts can be replaced with parts like the FRC Swivel Joint mount repair for light heads ($141.93), which fits Optimum, Focus, and Evolution lampheads.
Repair Versus Replace: Managing Fleet Lighting Costs
When a light fails, deciding whether to repair or replace the entire unit affects your budget and downtime.
Replace the unit if the lamphead is cracked, severely corroded, or electrically damaged beyond repair. Repair attempts on damaged housings often fail within weeks.
Repair by replacing components if the housing is sound but a bulb, lens, or connector failed. A $82 bulb replacement beats a $500+ lamphead replacement. Keep common parts in stock to minimize downtime.
Track repair costs per vehicle. If one vehicle requires repairs more than twice per year, replacing the entire unit may be more economical than ongoing repairs.
Document all decisions in your maintenance log. Over time, patterns show which vehicles are reliable and which drain maintenance budgets.
Fleet vehicle lighting maintenance requires a systematic approach. Pre-trip checks catch obvious failures. When your lighting systems fail, our replacement bulbs, lenses, and mounting hardware keep your vehicles operational and your teams safe.
Frequently Asked Questions
How often should fleet vehicle lights be inspected?
Pre-trip inspections should occur before every shift or deployment. Scheduled maintenance inspections depend on operating environment: vehicles in harsh conditions (salt spray, extreme vibration, rough terrain) require monthly checks, while standard fleet vehicles benefit from quarterly inspections. High-mileage emergency vehicles should be inspected every 30 days. Document all inspections to identify patterns and schedule repairs before failures occur in the field.
What should a fleet vehicle lighting inspection checklist include?
A comprehensive fleet vehicle lighting inspection checklist must cover headlights, taillights, brake lights, turn signals, and warning lights for proper function and brightness. Include visual checks for damaged or dirty lenses, wiring condition, connector corrosion, and secure mounting hardware. Test flashing patterns on emergency lights, verify light alignment, and document any defects with severity ratings. Pass/fail criteria ensure consistency across your fleet and support compliance documentation.
Why do vehicle lights fail, and how do I troubleshoot them?
Fleet vehicle lights fail due to bulb burnout, corroded electrical connectors, wiring faults, moisture intrusion, and vibration damage to mounting hardware. Start troubleshooting by checking bulb condition and replacement date. Test electrical connections with a multimeter for voltage and continuity. Inspect wiring for cuts, corrosion, or loose connectors. Modern emergency vehicles may have intermittent faults tied to vehicle electronics; if basic checks pass, consult the vehicle's diagnostic system or contact a specialist for LED or HID systems.
When should fleet vehicle bulbs or LED lights be replaced?
Replace bulbs immediately if they fail to illuminate, flicker, or produce dim output. Halogen bulbs typically last 500-1000 hours; schedule replacement during preventive maintenance intervals. LED lights last significantly longer but should be replaced if they fail, dim noticeably, or change color. For emergency vehicles, replace bulbs proactively during scheduled maintenance rather than waiting for failure. Keep replacement bulbs in inventory and track service life to predict future replacements and reduce unexpected downtime.